 Tips For Safe DIY Installation
It’s the end of summer. The kids are all back to school. Some of us are looking forward to hoodies, jeans, boots, turning leaves, and pumpkin spice. But along with all of those wonderfully comforting things come dark mornings, short days, and blustery winds. A bleary-eyed mom or dad gets out of bed at 6:00 AM to get a cup of coffee and enjoy a few minutes of quiet before it is time to wake the kids for school. The parent reaches out to turn on the kitchen light and, BAM! The light is so bright that they have to cover their eyes to make it to the coffee machine! It’s times like these when we all wish for dimmer switches.
Dimmer switches don’t have to remain on your wish list. Installing dimmer switches is a very small project with a big return. It is also a project easily done yourself with the right knowledge and equipment.
First thing you need to do is a little research. What type of light do you intend to be connected to the dimmer? If you will be using LED, CFL, xenon, halogen, or fluorescent bulbs, make sure the dimmer you purchase is rated for use with those types of bulbs. You must also determine how many lights you will have connected to the dimmer. If you have two 75 watt lights, you will need a dimmer that is rated for at least 150 watts.
Once you have the right dimmer and the necessary tools for the job, TURN OFF THE ELECTRICITY. We cannot emphasize that enough, so we will say it again. TURN OFF THE ELECTRICITY AT THE MAIN BREAKER BOX. Put a piece of masking tape over the breaker switch and write DO NOT TOUCH. That way, the switch cannot get turned on accidentally during your project.
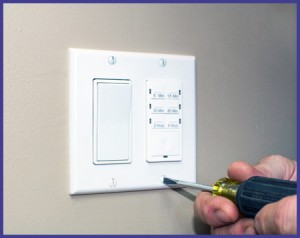
Next, remove the switch plate from the wall and make sure the switch is in the off position. Test the wires with a voltage tester to confirm they aren’t carrying any current. Once you have confirmed there is no electricity flowing, then you can remove the switch from the wall.
Loosen the screws that hold the electrical wires to the sides of the switch, making sure to pay attention to which wire came from which screw. A handy tip would be to take a picture with your cell phone to reference when reconnecting to the dimmer switch. Keep the wires separated and away from each other by bending them out towards the corners of the box. If the switch is grounded, remove the grounding wire last.
You can then proceed with attaching the dimmer switch. Attach each wire in the same way they were attached to the switch you removed. Tighten each screw, making sure that each wire is securely against the screw. At this point, you can gently tuck any excess wire and place the dimmer into the electrical box. Attach the switch to the box by tightening the screws, and then replace the switch plate. Once this is done, turn the breaker back on, and check your handiwork!
If you are at all uncertain at any step along the way, call a licensed professional electrician like the ones at Hufnagel Electric. A licensed electrician can make sure that you have a safe, quiet, and comfortable few moments on those crazy school mornings.